Monday, August 31, 2009

Recipe: Hummus duo and baba ghanoush with pita crisps

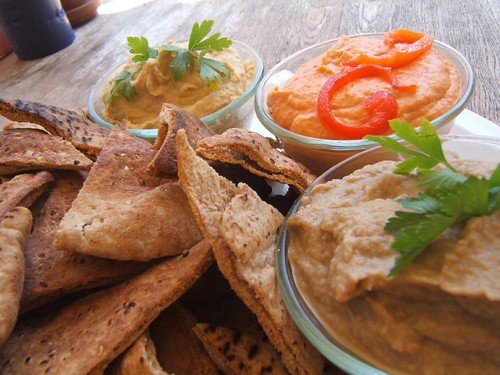
I went to a potluck this weekend, and needed to bring something that could be served cold, since I had a load of errands to run beforehand. Of course, I also wanted it to be somewhat impressive. I decided to go with a selection of dips and pita crisps for dipping:


Yum, no? I made baba ghanoush, roasted red pepper hummus, and a classic plain hummus. It sounds like a lot of work to make three dips, but a lot of the prep work for these is combined, so if you're going to commit to one, the trio can be done for not a lot of additional effort. For example, you can roast the eggplant, red pepper, and garlic at the same time, and also have the pita toasts going on your second oven rack. And then you have a great selection of dips to take to parties, break out as snacks, spoon on top of salads, etc. The possibilities are endless!

To make your own, you will need:

1 head garlic
1 large eggplant (1.5-2lbs)
2 red peppers, halved, with seeds removed
2 c. chickpeas
1/4 c. +2 tbsp lemon juice (1/4 c. for hummus, 2 tbsp for baba ghanoush)
1/4 c. tahini (2 tbsp for hummus, 2 tbsp for baba ghanoush)
1 tbsp cumin (2 tsp for the hummuses, 1 tsp for baba ghanoush)
1/4 c. cayenne (optional)
2 tbsp olive oil (1 for hummus, 1 for baba ghanoush), plus ~2tbsp for roasting vegetables
salt to taste
a few sprigs parsley for garnish

NOTE: Both hummus and baba ghanoush can be adjusted a lot to suit your tastes. These are the general proportions that create a hummus that I like, but you may find you prefer something a little different. Treat the recipes more as suggestions than anything set in stone, and feel free to adjust quantities or make additions as you see fit.

If you want to make pita chips, you will also need some pita bread. I used 1 package of 8 pitas for the potluck, but you definitely get enough dip to use up a couple of packages. Slice pitas into eights to make chips


1. Slice eggplant in half and salt. Leave eggplant to sweat for 30 minutes.

2. Brush eggplant and red peppers with olive oil and arrange on a baking sheet. Place garlic on baking sheet as well. Bake in a 450F oven until eggplant is soft and peppers are slightly blackened, ~20 min. If you are making pita chips, you can also arrange them on a baking sheet and toast while you have the oven going.

3. While the vegetables are roasting, you can get started on the plain hummus: in a food processor, combine the chickpeas, 1 tbsp olive oil, 2 tbsp tahini, 2 tsp cumin, and 1/4 c. lemon juice. Blend until smooth, thinning with water as needed (you can also thin with lemon juice or olive oil--be sure to taste test frequently to see how things are shaping up!)

4. Remove vegetables from oven. Leave the eggplant and peppers for a moment. Pull all the cloves off of the garlic and squeeze the garlic out of its skins. Add half of the garlic to the hummus and blend thoroughly. Remove a little more than half of the hummus from the food processor, and your classic garlic hummus is done! The hummus left in the food processor will form the basis of the red pepper hummus.

5. Peel the skins off of the red peppers. Slice a thin piece or two off of the peppers to use as garnish. Coarsely chop the remaining pepper and toss in the food processor with hummus. Blend until smooth. Scrape the hummus out and clean off the food processor for the final dip, baba ghanoush.

6. Baba ghanoush time! Remember that eggplant you roasted? Scrape out the flesh and place it in the food processor (chuck the skins into your compost). Add the rest of the garlic, 2 tbsp lemon juice, 2 tbsp tahini, 1 tsp cumin, 1/4 tsp cayenne and 1 tbsp olive oil. Blend until smooth. Scrape out the baba ghanoush.

7. Arrange your dips in nice bowls and garnish with parsely and red pepper slivers. Serve with pita chips:


Enjoy!

Friday, August 28, 2009

Millions of peaches...

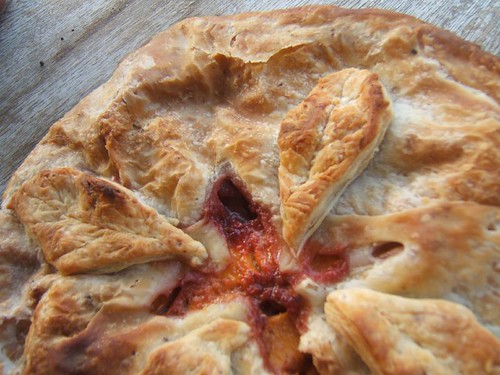
Okay, maybe not quite millions, but today's dish+recipe packs a serious peach punch. Peaches were a mere 50 cents a pound at the grocery store this week, a bargain even here in the land of abundant affordable produce. This pricing scheme has two key implications. First, I have been eating a half dozen peaches or so every day. Second, it's time to make a peach pie:


I like to keep my peach pie fairly simple, with minimal additions. I did make the crust for this one from scratch, but I hear it's possible to get perfectly acceptable (and even vegan) puff pastry in the freezer case of your grocery store these days. Personally, I am determined to eventually make a good vegan rough puff (this one was merely okay, so I'm not posting the recipe) so I am resisting the siren call of Pillsbury for now.

Once you have figured out the pastry end of things to your satisfaction, it's time to make the filling. One thing I personally hate about fruit pies is that you sometimes wind up with a huge gap inside the pie between crust and filling. This gap is due to the pastry baking enough for its shape to set before the fruit has really started to cook down and shrink in volume. The solution to this problem is to pre-cook the fruit for 15-20 minutes on the stovetop.

For a super peachy filling, you will need:

~4lbs ripe peaches, washed, pitted, and sliced (NOTE: Try to get peaches that are not underripe, as they aren't as sweet).
juice of 1 lime
1 1/2 tsp. cinnamon
1/2 tsp. nutmeg
1 tbsp. sugar
1 tbsp. cornstarch or arrowroot powder

1. In a large saucepan, mix together peaches and lime juice and let sit for a few minutes.

2. Add nutmeg, cinnamon, and cornstarch to peaches and stir together until well mixed

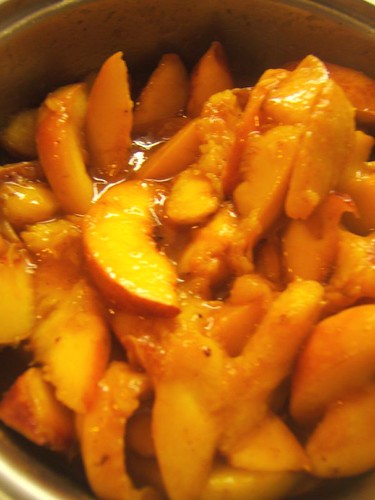
3. Place saucepan on stove over medium heat. Cover saucepan and cook peaches for 15-20 minutes, stirring every few minutes. If the peach juice begins to boil, reduce heat. Eventually your peaches should look something like these guys:


4. Turn heat off on stove and add the sugar to peach mixture. Roll out the bottom half of your pie crust and place in pie dish. Spoon the peach filling into crust. Roll out top crust and place over top of filling. If you have leftover pastry dough, use some to decorate your pie. I usually go with four leaves (as pictured above), but there's no reason why you couldn't do something different.

5. Place pie in a 450F oven and bake for 30-40 minutes, until pie is nicely browned.

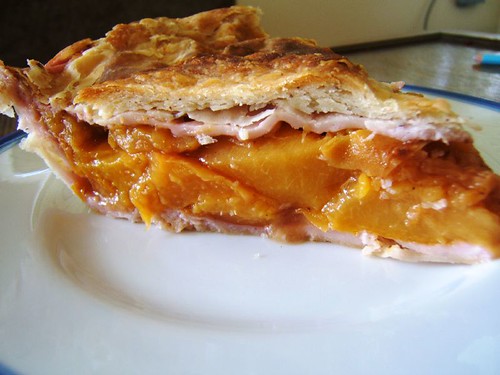
6. Slice and serve:

Wednesday, August 26, 2009

Recipe: Black bean soup with kale and tomatoes

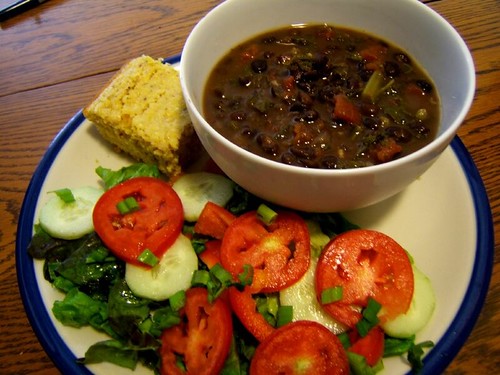
Although it is technically the peak of summer here, we've been getting a lot of cool, cloudy weather, courtesy of the local marine layer. Which means that fall foods like hot soup are totally appropriate for the menu rotation, especially paired with a simple salad and some delicious cornbread like the stuff featured yesterday:


Black bean soup is one of my favorites, but I find it can be kind of heavy if it's just beans. This version mixes things up by adding in tomatoes and kale. It's delicious, filling, and with the fiber, iron, calcium, and protein, also made of nutritional win.

Black bean soup with kale and tomatoes


Ingredients

5 cups cooked black beans
28 oz can diced tomatoes
1 15oz can vegetable broth OR 1 carrot and 1 stick of celery, diced, plus a pinch each of oregano and thyme
3-5 c. water (depending on whether or not you are using stock)
1 bunch kale (approx. 1/2 lb), finely chopped
1 medium onion, diced
4-5 cloves crushed garlic (you can dial down the garlic if you like, I tend to load it onto everything)
1 tbsp olive oil
1 1/2 tsp. cumin
1 1/2 tsp. coriander
1/2 tsp. cayenne pepper (adjust as desired depending on your heat preference)
salt and pepper to taste.

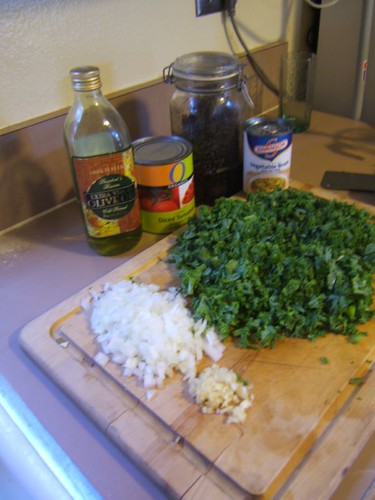
1. Assemble all your prepared ingredients:


2. In a large saucepan or soup pot on medium heat, heat the olive oil. When a piece of garlic dropped in sizzles, you're good to go.

3. Add the garlic to the oil and saute for 1 minute. Add the onions and continue to saute, stirring occasionally, for 2-3 minutes. If you are not using stock, add the diced carrot and celery. Continue to saute until onions are nicely softened up and slightly clear (not carmelizing, although some carmelization will not ruin things, so don't sweat it too much). Add the cumin and coriander.

4. Add kale into the mix and cover pot for 1 minute, kale should be lightly steamed. Remove lid and stir for a few more minutes, until kale is fairly wilted.

5. Add cayenne, vegetable stock (if using, alternatively add 2 c. additional water), tomatoes, 2 c. water, and black beans. Stir together and cover pot. Bring mixture to a boil, then turn heat down and leave soup to simmer for 30 minutes. Check occasionally and add additional water if needed. Salt and pepper to taste. I find it's best to go light on the salt and pepper in the soup pot and then let people go with their own preference after it's been served into bowls. Which leads nicely to step 6....

6. Turn off burner and ladle soup into bowls. Serve with salad and cornbread.

If you don't have cornbread handy, a few tortilla chips crumbled on top are also a nice touch. Or just skip the refined carbs completely if you must, the soup will be delicious on its own.

Tuesday, August 25, 2009

Cornbread!

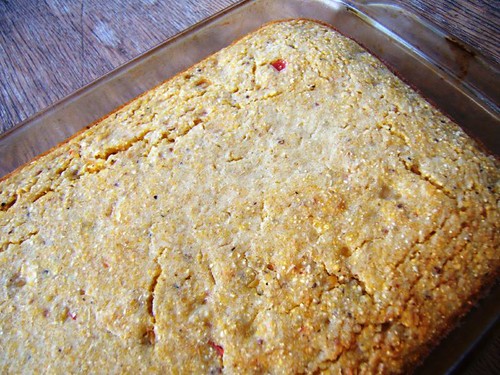
Last night for dinner I cooked up a big pot of soup (more on that in a later post), and I was in the mood for a little something to go along with it. Conveniently, I also had some cornmeal in the freezer, so I decided to go for cornbread:


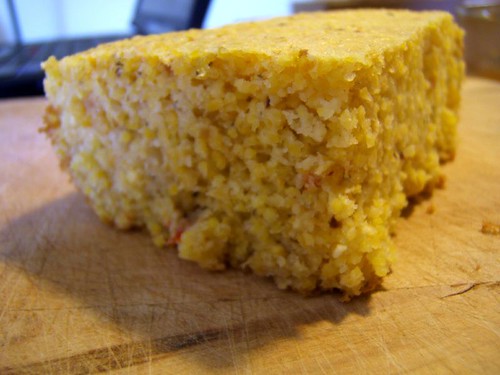
Cornbread is one of those typical Southern foods that I love even though I rarely ate it growing up (also on this list: okra, collard, grits). My mother finds the texture too coarse, so she didn't serve it often. So I don't have a tried and true family recipe to share with you, sorry! Instead, I used this delicious vegan cornbread recipe. The only modifications I made were to use 1/4 c. of oil instead of 1/3, and to add about 3/4 c. of corn salsa. The result was a delicious, moist, cornbread with a little bit of kick from the salsa:


One of the best things about this recipe is that it does not have too much sweetener, just a few spoonfuls of maple syrup. A lot of cornbread recipes I have seen call for a ton of sugar, anywhere from 1/2 to a whole cup, which I think is really more like a recipe for corn cake! I think next time I make this recipe I may even cut the maple syrup down to a single tablespoon because even this cornbread was just a little bit sweeter than what I am used to.

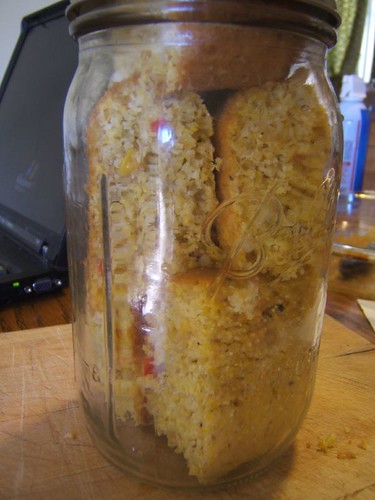
Finally, a note about storing your cornbread. Like most quickbreads, it is best eaten straight out of the oven or within a day or two of baking. If you are a single person like moi, you may not care for the rate of cornbread consumption that requires. Fortunately, cornbread (and most quickbreads) freezes well! I wound up putting about two-thirds of this batch into the freezer for later consumption, while the rest is currently chilling out in a Mason jar in the fridge:


Yes, if you're out of tupperware, a mason jar will absolutely do!

Monday, August 24, 2009

Mediterraneand salad

Yup, another salad. What can I say? It's summer and they're delicious!

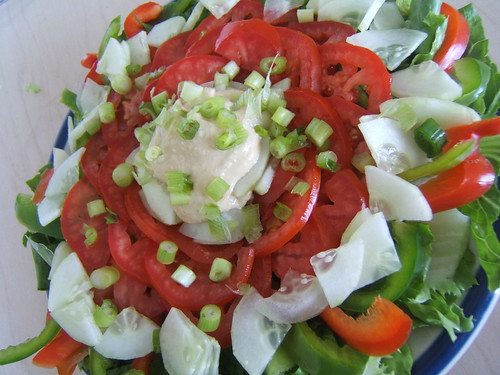
This salad mix is my basic lunch fallback when I don't want to have to think too much about ingredients or flavor combinations. Right now I'm probably eating it a couple of times a week:


I like to think of the flavor theme as vaguely Mediterranean, but really it's just good.

You'll need (for a 1-person meal sized salad):

6 leaves red leaf lettuce, washed and chopped
1 roma tomato, sliced
1/2 green bell pepper, sliced
1/2 red bell pepper, sliced
1/2 cucumber, peeled. Slice the cucumber into thin pieces and quarter them to get the look here.
2 tbsp hummus
handful chopped scallions

To assemble: You can toss everything together or go for a fancier assembly (pictured above). I place the lettuce on a plate and spread it evenly across the surface (not mounded in the center). Then arrange the vegetables. Here, the peppers form the base of the vegetable topping, arranged to lie like bicycle wheel spokes. The tomato goes next, forming a ring around the middle of the plate. Finally, place the cucumbers in a mound inside the tomatoes, and leave a small depression for the hummus. I had quite a bit of cucumber so I also put some around the outside of the tomatoes. Finally, spoon the hummus onto the cucumbers and top with scallions.


Say grace, dig in, and enjoy!

Saturday, August 22, 2009

Sweet Tooth Saturday

I don't know about you, but I really love making (and eating) desserts. Sure, the stuff that comes before is great too, but a really good dessert? Hands down one of the best things ever.

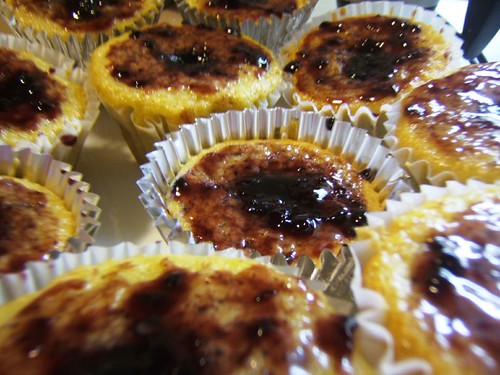
I got into making cupcakes a while back when the amazing Vegan Cupcakes Take Over The World came out. Since then I've started playing around with my own flavor combinations and making up recipes. Some are better than others (ask me about the licorice cupcakes I made last Halloween sometime...), but these latest ones are definite winners:


Lemon cupcakes with blackberry filling and a lemon buttercream frosting. Yum! Like a lot of my cooking and baking, this recipe was inspired by odds and ends in the kitchen that needed using up quickly. I had a few lemons that were heading towards overripe, and also some leftover blackberry flummery (basically a blackberry sauce concoction...I thickened it up on the stove a bit for use here, I've written the recipe to just use blackberry jam since I eventually wound up with that general consistency).

This recipe makes about a dozen cupcakes, although I think I could have stretched it to 13 or 14 if I had been using regular rather than "jumbo" liners. You will need:

Dry ingredients
1 1/4 c. flour
2 tbsp arrowroot powder
1 tsp baking powder
1/2 tsp baking soda
pinch of salt

Wet ingredients
1 c. milk
3/4 c. sugar
1/4 c. lemon juice
1/3 c. canola oil
1 tbsp vanilla extract
zest of 1 lemon

Filling
3/4 c. blackberry jam or preserves. Blueberry would probably also work well.

Frosting
1/2 c. margarine or shortening
juice of 1 lemon
1/4 c. soymilk
2 c. confectioners sugar

1. Preheat oven to 350F and prepare a muffin tin with 12 cupcake liners.

2. In a mixing bowl, combine all of the wet ingredients (including sugar).

3. In a separate bowl, sift together dry ingredients.

4. Add dry ingredients into wet and stir together. It's important not to stir the batter for too long--no more than a few minutes. Don't worry if there are still a few lumps in the batter

5. Spoon batter into cupcake liners. I like to use a 1/4 c. measure and a silicone spatula to get the batter into the liners.

6. Bake at 350F for 20-25 minutes, until cupcakes are slightly browned. Remove from oven and transfer to a cooling rack. Allow cupcakes to cool completely before filling or frosting.

7. When cupcakes are cooled, poke a hole in the top of each one with a knife or your (clean) index finger. Load all but a few spoonfuls of the blackberry jam into an icing bag with a fairly wide tip attached. For each cupcake, place the tip into the hole you've poked and squeeze gently. After the cupcakes are filled, spread the remaining jam in a thin layer across the top of the cupcakes:


8. Prepare the frosting. With a hand mixer, cream the margarine, lemon juice, and soy milk and frosting together. Slowly sift in confectioner's sugar.

9. Frost the cupcakes! You can either spread with a knife or use an icing bag and tip to get fancy. Since these cupcakes are already spread with a jam layer, the icing bag route will give a tidier finish, but either will result in delicious cupcakes.

Thursday, August 20, 2009

sinquesadillas

Last weekend I had a potluck to go to, so I wanted to make something delicious and easy to eat. I cracked open my cookbooks and settled on the Grilled Yuca Tortillas recipe from Veganomicon, which is basically a recipe for quesadillas minus the cheese. However, when I went to pick up ingredients, I ran into a slight hitch: my food co-op did not sell yuca. The grocery store down the street did not have yuca (although they did tell me they have it sometimes, but it's a "seasonal" item). The grocery store by the library did not have yuca, and Trader Joes was also a yuca free zone.

I decided four stores was enough searching for one lousy root vegetable and started contemplating substitutes. After some conversation with the manager at my food co-op, I decided to go with a mix of russet baking potatoes and Garnet sweet potatoes. The Garnet potatoes are lighter in color than the usual sweet potatoes you find in the grocery store and are not as sweet. I picked up about 3/4 lb. of the Garnet potatoes, 2 large russet potatoes, and also one very large regular sweet potato (I made two flavors of this recipe, details below).

For the first filling, I used 1 1/2 russet potatoes and all the Garnet potatoes. I boiled all the potatoes and left the skins on since a) I like the taste of potato skins b) they add some nice flecks to the mashed potato and c) hello, that's where all the nutrients are! This version was made according to the main directions in Veganomicon, and I added in 2 roasted red peppers and approximately 1/2 c. of corn salsa that I had from Trader Joe's. This made enough filling for 7 large white flour tortillas.

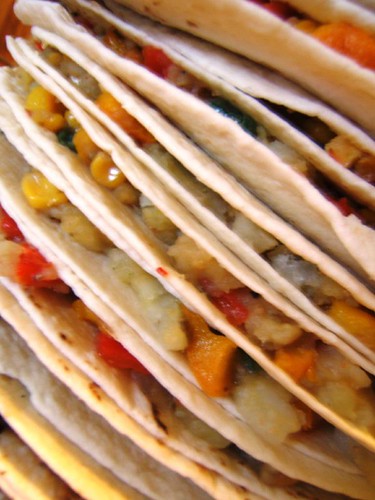
The second batch of quesadillas used the regular sweet potato and remaining 1/2 russet potato. I also added in approximately 1 c. of cooked black beans, a few teaspoons of cumin and a pinch of salt. This made enough filling for 6 large tortillas. After all the filling was in the tortillas, I had a massive and beautiful stack of no queso quesadillas waiting to be cooked:


Looks delicious, no?

Next, the recipe calls for browning the quesadillas on the stovetop. However, I only own a single frying pan and I didn't have all night to brown quesadillas. Instead, I turned my oven up to 350F, oiled a couple of baking sheets, and placed 3 tortillas at a time on each sheet. I then lightly oiled the tops of the quesadillas and popped them in the oven for 10-15 minutes while I primped for the party. When the tortillas were lightly browned on top, I took them out and cut each quesadilla in half. Everything was then nicely arranged on a platter along with a bowl of tropical salsa (mango, avocado, tomato, lime juice, cilantro, not pictured...sorry! I was running late!).

For comparison purposes, I did also cook a few quesadillas on the stove. Honestly, I thought the ones in the oven were a little better--they had more crunch and did not seem as greasy as the stovetop version. However, if I were only making 1 or 2 quesadillas, I would probably still go with the stovetop method rather than going to the trouble of turning on the oven.


Ironically, on my way to the party, I had to stop in at a fifth grocery store, and what do you think I saw staring me in the face from the produce section? Yes, yuca. Unbelievable.