Wednesday, October 14, 2009

recipe: crockpot spaghetti squash with tomato and onions

Lately I am on a fall cooking kick. The weather is cooling down, we had rain this week, it's gray and miserable out and I love it! Really. And when you've been out and about in cold miserable weather, there's nothing as good as coming home to the smell of a delicious hot meal ready and waiting for you to chow down on, right? What's that? You live alone and nobody is at home cooking up a storm and waiting anxiously for your return? Awww. Sad. But not a problem! If you don't happen to have a live-in check, you can get this experience quite easily by purchasing a crockpot. They're relatively inexpensive (and can frequently be found at thrift stores or garage sales--just check that the cord is not worn out before buying) and are a huge timesaver in the kitchen. In general I do not own a lot of gadgets (no bread machine, no stand mixer, no blender (a food processor works just as well), etc.), but the crockpot is one gadget I really love and would hate to do without. You can make soups, chili, large batches of beans to freeze and use later, etc. Sold on the idea yet? No? Well, you can also make this delicious dish:


Spaghetti squash! Quite possibly my favorite squash ever (although butternut is quickly working its way into my good graces). When cooked, the flesh of the squash separates into thin, spaghetti like strands, thus the name. I think most people roast spaghetti squash, but my mother always cooked it on the stovetop. Because I am lazy, I adapted it to work in the crockpot.

If you want to make your own, you'll need to start off by assembling the appropriate component parts:


Here we have:

2 medium spaghetti squash (about 5 lbs each)
1 28 oz. can diced tomatoes
2 medium onions (dice these)
4 cloves garlic (crushed)
1 c water or vegetable stock
1 tbsp olive oil

You'll also need about a teaspoon each of basil, marjoram, thyme, and oregano (adjust to taste, I tend to just toss stuff in).

Start by prepping your squash. You will need to remove the skin. This step can be a real pain in the neck, but sticking the squash in the microwave for about 5 minutes beforehand really speeds things up and makes the skin easier to get off. I generally find the squash skin is easiest to get off using a serrated bread knife, like so:

Once the squash is de-skinned, scoop out the seeds and slice into about 3/4" thick rings. Place in a crockpot and add the canned tomatoes:
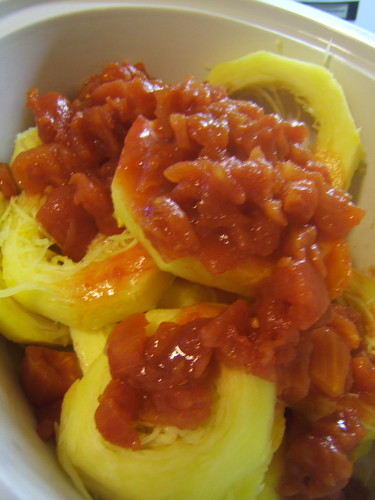

Turn the heat onto low and cover it up. Now to give the onions and garlic a little saute before throwing them into the mix. I know, I know, the whole point of a crockpot is that you don't have to mess around with cooking things on the stove. But trust me, in the case of onions, a few minutes time is so worth it. If you really want to keep it simple, add the onions and garlic raw, but don't come crying to me when your squash tastes like raw onions. I won't want to hear it.

So anyway. Heat a tablespoon of olive oil in a frying pan over medium heat. When the oil is hot, throw in the onions and garlic, stirring around to distribute the oil. Saute for 5-8 minutes, until the onions are soft and a little translucent:
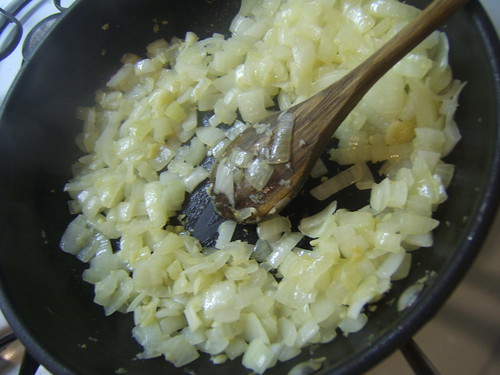

Mmmmmm. The other reason I don't mind taking time to saute the onions is that I love the way they smell when they're cooking.

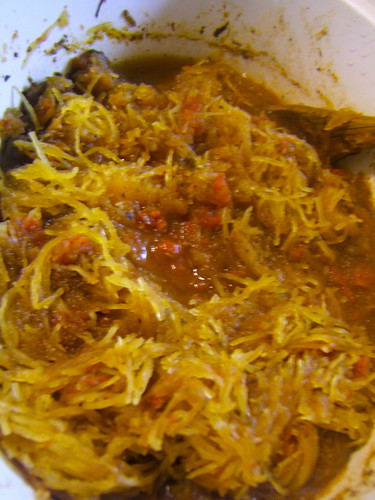
Finally, toss the onions, garlic, and herbs into the crockpot. Stir everything around and pour a cup of water or stock over the top. Leave on low for ~8 hours (time may vary depending on your pot), then enjoy! This recipe will make 6-8 portions, depending on whether you are eating as a side or a full on meal. If you are planning to eat it as a meal, tossing in some chickpeas or white beans will up the protein content and make it a bit more filling.

Thursday, October 8, 2009

Kanelbullens Dag, North American style

This past weekend we had a sudden transition into what passes for fall out here--a breeze picked up, temperatures went down, the air was positively crisp. No leaves changing color, but I'll take what I can get. In short, the weather was perfect for a little fall baking:


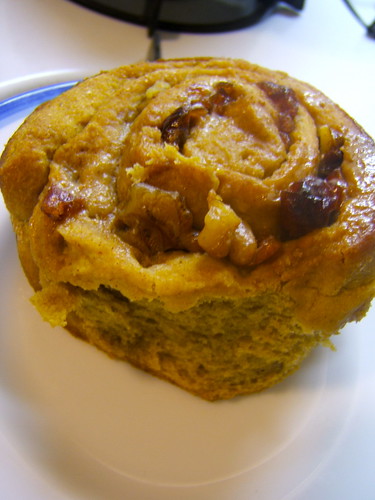
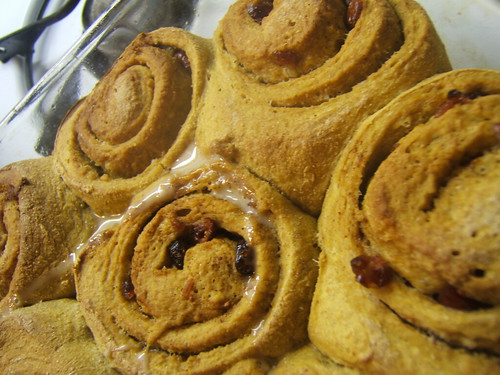
This here is the beginning of a seriously delicious batch of cinnamon rolls. Not just any cinnamon rolls though. Pumpkin cinnamon rolls. With cranberries and walnuts. Sounds delicious, no? They look delicious also:

And they are even MORE delicious if you take it a step further and top them off with a maple glaze:

Yum. Recipe, you ask? Well....I don't exactly have one yet. I used this recipe on the King Arthur Flour blog as a loose inspiration, but I made some definite changes. Mainly, I turned the recipe vegan, but I also played around with the spices and the dry:wet ingredients ratio. My one complaint about cinnamon rolls (in general) is that they can be VERY dry, which I do not care for at all. So I had to do some tweaking to make sure these rolls came out moist. I did make some notes on my modifications, but I'm going to need to make these at least once more before I've got things down and have a real recipe to share. Which means that this fall, I'm going to be having a lot more breakfasts like this:

Can't complain.

Sunday, October 4, 2009

snacktime!

While I am mostly a three squares a day kind of girl, I frequently find that I need a bit of a snack in the afternoons to hold me over between lunch and dinner. Recently, I've also been increasing my running mileage a bit and I've discovered that while heading out the door for a three mile run first thing in the morning with nothing in my stomach is no problem, heading out on a five or six mile run without a little snack beforehand does not work out so well.

Of course, there are lots of easy snacks out there: fruit, the ever popular hummus and vegetables combo, a handful of nuts, and so on. But there are also lots of fun snacks you can make with not too much effort at home. Recently, I started experimenting with making my own fruit and nut bars, based loosely on the commercial Larabars. I am actually not a huge Larabar eater because those things are kind of pricey, but if you do like them, you'll probably have noticed the super short ingredients list. Each bar is basically some combination of fruit and nuts--pretty much nothing synthetic or chemically or what have you. Sounds great, right?

There are several recipes for homemade "Larabars" floating around on the internet (like this, or this). I checked a few out and then got to experimenting. For this first try, I was lazy and didn't feel like going out for special ingredients, so I used nuts and flavorings that happened to be in my cabinet to devise a chocolate hazelnut flavor combination.

I used:

3/4 c. dates (measure AFTER pitting)
1/3 c. raw hazelnuts
1/4 c. raw cacao nibs
1/2 tsp. vanilla extract
1/2 tsp. hazelnut extract

To make:

1.Place dates in a food processor and blend into a paste. Transfer paste from processor into a bowl.

2. Place nuts and cacao nibs into processor, and pulse until finely chopped. Add nut/cacao mixture and extracts to bowl with date paste. It will look something like this:


3. Mash everything together. Use your (clean!) fingers. When everything is thoroughly mixed, shape the dough. You can go for bars, or pinch pieces off to roll into balls (I went with this method), or really, whatever you want. Store in the refrigerator to maintain maximum freshness.

This recipe makes about a dozen truffle balls or around 4 good sized bars.

So, how did they turn out? Delicious! So delicious that I disposed of them all before I remembered to take a picture of the finished product. Oops. However, I'll definitely be making these again, and experimenting with some flavor variations. I think a nice addition to these would be a spoonful of baking cocoa, to really intensify the chocolate flavor. Yum.

Friday, October 2, 2009

Full breakfast, vegan style

I am not one of those vegetarians who gave up eating meat because I just didn't care for the taste. Prior to my conversion to herbivory, I was absolutely a fan of the stuff. When I decided to make the switch, some types of meat were definitely easier to forgo than others. Chicken, for example, was not really missed all that much. One of the things I did miss were all those delicious fried pork products: bacon, sausage links, sausage patties, etc. Some of the meat facsimiles out there are decent, but I don't really like to eat commercially processed fake meats that often. So my life became pork-product free and, I admit, sometimes at family breakfasts I would stare wistfully at the plate of sausages.

Well, no more! One of the most exciting (to me, anyway) sections of Vegan Brunch is, you guessed it, sausage! It is a little time consuming to make (40 minutes of steaming, anyone?), but the results are so worth it. Nobody who eats actual meat will mistake these for genuine pork sausages, but they are still very tasty and the texture is quite meaty in nature.

There are a couple of sausage recipes in the book, the ones I tried were the chorizo flavor. A few of the ingredients proved difficult to find--namely, smoked paprika and dry rubbed sage. I used regular paprika and regular sage, then tossed in about a half a teaspoon of liquid smoke.

The majority of the sausages were consumed at a brunch party, but I did manage to have a few leftovers, which I did homage to by preparing a full breakfast:


Toast, scrambled tofu, sausage, and some sauteed tomatoes. Mmmmmmm.