Showing posts with label recipes. Show all posts

Wednesday, October 14, 2009

recipe: crockpot spaghetti squash with tomato and onions

Lately I am on a fall cooking kick. The weather is cooling down, we had rain this week, it's gray and miserable out and I love it! Really. And when you've been out and about in cold miserable weather, there's nothing as good as coming home to the smell of a delicious hot meal ready and waiting for you to chow down on, right? What's that? You live alone and nobody is at home cooking up a storm and waiting anxiously for your return? Awww. Sad. But not a problem! If you don't happen to have a live-in check, you can get this experience quite easily by purchasing a crockpot. They're relatively inexpensive (and can frequently be found at thrift stores or garage sales--just check that the cord is not worn out before buying) and are a huge timesaver in the kitchen. In general I do not own a lot of gadgets (no bread machine, no stand mixer, no blender (a food processor works just as well), etc.), but the crockpot is one gadget I really love and would hate to do without. You can make soups, chili, large batches of beans to freeze and use later, etc. Sold on the idea yet? No? Well, you can also make this delicious dish:


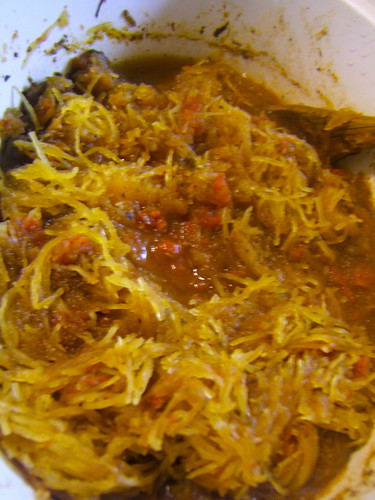
Spaghetti squash! Quite possibly my favorite squash ever (although butternut is quickly working its way into my good graces). When cooked, the flesh of the squash separates into thin, spaghetti like strands, thus the name. I think most people roast spaghetti squash, but my mother always cooked it on the stovetop. Because I am lazy, I adapted it to work in the crockpot.

If you want to make your own, you'll need to start off by assembling the appropriate component parts:


Here we have:

2 medium spaghetti squash (about 5 lbs each)
1 28 oz. can diced tomatoes
2 medium onions (dice these)
4 cloves garlic (crushed)
1 c water or vegetable stock
1 tbsp olive oil

You'll also need about a teaspoon each of basil, marjoram, thyme, and oregano (adjust to taste, I tend to just toss stuff in).

Start by prepping your squash. You will need to remove the skin. This step can be a real pain in the neck, but sticking the squash in the microwave for about 5 minutes beforehand really speeds things up and makes the skin easier to get off. I generally find the squash skin is easiest to get off using a serrated bread knife, like so:
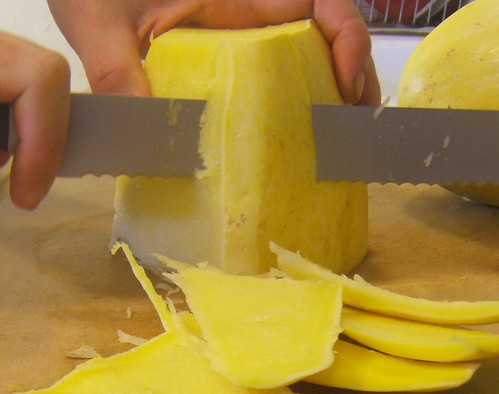
Once the squash is de-skinned, scoop out the seeds and slice into about 3/4" thick rings. Place in a crockpot and add the canned tomatoes:
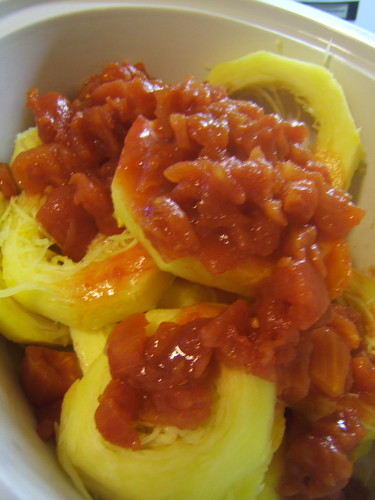

Turn the heat onto low and cover it up. Now to give the onions and garlic a little saute before throwing them into the mix. I know, I know, the whole point of a crockpot is that you don't have to mess around with cooking things on the stove. But trust me, in the case of onions, a few minutes time is so worth it. If you really want to keep it simple, add the onions and garlic raw, but don't come crying to me when your squash tastes like raw onions. I won't want to hear it.

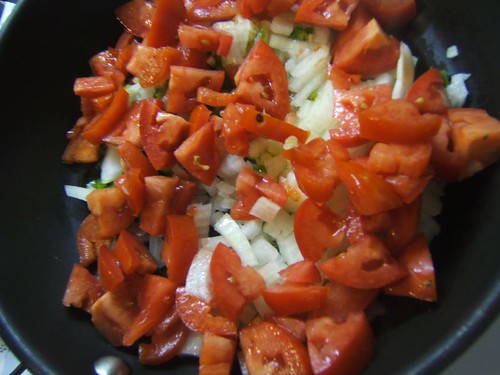
So anyway. Heat a tablespoon of olive oil in a frying pan over medium heat. When the oil is hot, throw in the onions and garlic, stirring around to distribute the oil. Saute for 5-8 minutes, until the onions are soft and a little translucent:
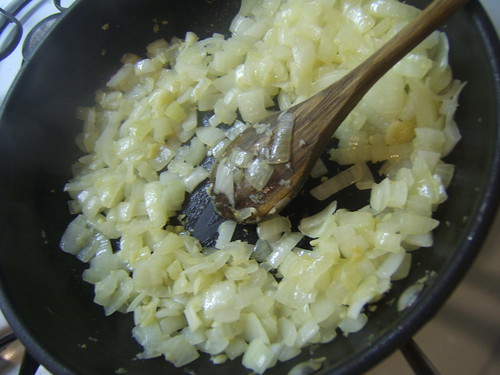

Mmmmmm. The other reason I don't mind taking time to saute the onions is that I love the way they smell when they're cooking.

Finally, toss the onions, garlic, and herbs into the crockpot. Stir everything around and pour a cup of water or stock over the top. Leave on low for ~8 hours (time may vary depending on your pot), then enjoy! This recipe will make 6-8 portions, depending on whether you are eating as a side or a full on meal. If you are planning to eat it as a meal, tossing in some chickpeas or white beans will up the protein content and make it a bit more filling.

Sunday, October 4, 2009

snacktime!

While I am mostly a three squares a day kind of girl, I frequently find that I need a bit of a snack in the afternoons to hold me over between lunch and dinner. Recently, I've also been increasing my running mileage a bit and I've discovered that while heading out the door for a three mile run first thing in the morning with nothing in my stomach is no problem, heading out on a five or six mile run without a little snack beforehand does not work out so well.

Of course, there are lots of easy snacks out there: fruit, the ever popular hummus and vegetables combo, a handful of nuts, and so on. But there are also lots of fun snacks you can make with not too much effort at home. Recently, I started experimenting with making my own fruit and nut bars, based loosely on the commercial Larabars. I am actually not a huge Larabar eater because those things are kind of pricey, but if you do like them, you'll probably have noticed the super short ingredients list. Each bar is basically some combination of fruit and nuts--pretty much nothing synthetic or chemically or what have you. Sounds great, right?

There are several recipes for homemade "Larabars" floating around on the internet (like this, or this). I checked a few out and then got to experimenting. For this first try, I was lazy and didn't feel like going out for special ingredients, so I used nuts and flavorings that happened to be in my cabinet to devise a chocolate hazelnut flavor combination.

I used:

3/4 c. dates (measure AFTER pitting)
1/3 c. raw hazelnuts
1/4 c. raw cacao nibs
1/2 tsp. vanilla extract
1/2 tsp. hazelnut extract

To make:

1.Place dates in a food processor and blend into a paste. Transfer paste from processor into a bowl.

2. Place nuts and cacao nibs into processor, and pulse until finely chopped. Add nut/cacao mixture and extracts to bowl with date paste. It will look something like this:


3. Mash everything together. Use your (clean!) fingers. When everything is thoroughly mixed, shape the dough. You can go for bars, or pinch pieces off to roll into balls (I went with this method), or really, whatever you want. Store in the refrigerator to maintain maximum freshness.

This recipe makes about a dozen truffle balls or around 4 good sized bars.

So, how did they turn out? Delicious! So delicious that I disposed of them all before I remembered to take a picture of the finished product. Oops. However, I'll definitely be making these again, and experimenting with some flavor variations. I think a nice addition to these would be a spoonful of baking cocoa, to really intensify the chocolate flavor. Yum.

Friday, September 25, 2009

Recipe: fragrant chickpea curry

This curry is one of my never fail dishes that I like to break out if I have folks coming over for a casual dinner, or if I just have a busy week coming up and need a big pot of something delicious to eat through the week. The dish originally came from my mother's friend Pamela, and called for "one rotisserie chicken". My mother veganized it by using chickpeas instead, then passed the recipe on to me. I have since played around with it a little more. The ingredients are pretty simple, but the finished product is delicious! Serve over rice with a salad or steamed vegetables on the side.


Fragrant chickpea curry (serves 6)

Ingredients

2 tablespoons curry powder

2 tablespoons grated fresh ginger

½ teaspoon cinnamon

¼ teaspoon ground cloves

¼ teaspoon cayenne pepper

2 tablespoons canola oil

1 large onion, halved and thinly sliced

4 garlic cloves

4 c. chickpeas

1 14-oz can light, unsweetened coconut milk

1 14 oz can diced tomatoes

1 c. vegetable stock


Method

1. Mix spices in a small bowl and set aside

2. Heat oil in small stock pot over medium-high heat

3. Add onion and saute until golden, 5 to 6 minutes

4. Add garlic and saute about 30 seconds

5. Add spices and saute until fragrant

6. Add chickpeas and stir until coated with spices

7. Add coconut milk, tomatoes, and stock

8. Bring to simmer, and cook until flavors blend and stew is thick, about 20 minutes.


Serve over rice and enjoy!

Sunday, September 13, 2009

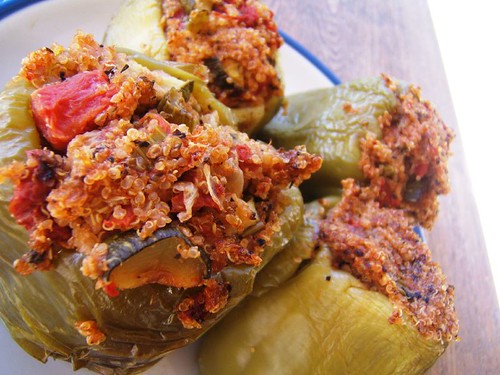
Recipe: Italian style quinoa stuffed peppers

Stuffed peppers are such a fun dinner to make--for some reason people are always more impressed by a grain/vegetable pilaf stuffed into a pepper and baked than they would be by the same pilaf served up as a side in a standard dish. There are endless possibilities for pepper stuffing, and my latest favorite is this one:


The filling is a mixture of quinoa, zucchini, celery, canned tomatoes, onion, and garlic, mixed with some Italian herbs and a healthy dose of white wine. The filling is then stuffed into peppers and baked for a bit to finish things off. Served with a nice salad, one of these peppers is absolutely a meal in itself. I like using quinoa instead of more standard fillings like rice because it has a high protein content, as well as calcium and iron. Plus it's delicious! Be sure to rinse the quinoa to remove bitterness before cooking.

To make four stuffed peppers of your own, you will need:

4 large green peppers, seeds removed

For the stuffing
1 tbsp olive oil
3-4 cloves garlic, crushed
1 small onion, diced
1 tsp oregano
1 tsp thyme
1/2 tsp basil
1 bay leaf
1 zucchini, diced
1 c. quinoa, rinsed
1 14oz. can tomatoes
1/2 c. white wine
1 c. water or vegetable stock

1. In a medium sized saucepan on medium heat (note: you will be cooking the quinoa in this pan as well, so a fry pan will probably NOT cut it), heat the oil. Add onions, saute for 4-5 minutes, until softened. Add garlic and saute for 1-2 minutes more.

2. Add oregano, thyme, basil, bay leaf, and zucchini. Saute for 3-4 minutes.

3. Add quinoa. Stir for 1 minute, all ingredients should be evenly mixed. Add tomatoes, wine, and water or vegetable stock. Cover pot and bring to a boil. Turn heat down and cover mixture, allowing to cook until liquid has been absorbed (~25-30 minutes). When the liquid is almost all absorbed, start the oven preheating to 350F.

4. Spoon filling into peppers, making sure to fill each one completely. Place peppers on a greased baking sheet and pop them in the oven for 30 minutes, or until outsides of peppers are beginning to brown.

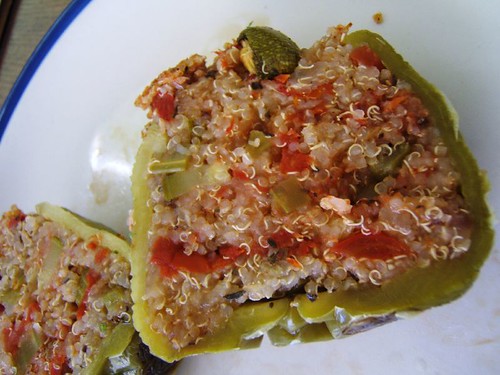
5. Remove peppers from oven and allow to cool for a few minutes. Serve whole or sliced in half to show off the stuffing:

Thursday, September 10, 2009

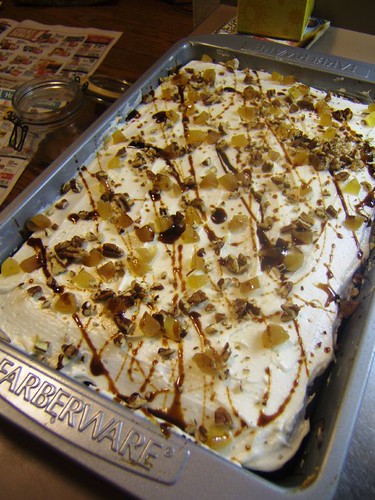
Jackson Pollock Gingerbread

I don't know that I've mentioned it on here before, but I do love a good dessert from time to time. I know people are down on sugar these days and I am definitely a proponent of limiting consumption. However, I also think it's okay to have a little something sweet after dinner a few times a week. Moderation is the key, folks! Also, it's my belief that if you are making most of your food (desert or otherwise) from scratch, you can cut a LOT of hidden sugars from the rest of your day. Have you looked at the labels on some packaged foods these days? Even things that are typically classed as savory frequently have sweeteners added. Get rid of all that stuff and you can most likely eat some dessert with no worries (depending on your personal health conditions and just what you are making to eat during the rest of the day, of course). And the next time you are in a dessert mood, allow me to recommend that you whip up a batch of this lovely stuff:


I've termed this number the Jackson Pollock Gingerbread, for the rather abstract decoration scheme that tops it off. The recipe is adapted from one originally posted over at Angry Chicken. There's a sort of secret ingredient: coffee! I know it sounds weird but it really adds a nice deep flavor to the finished product. I've veganized it, made some additions, and top with a lemon icing, crystallized ginger, chopped nuts, and molasses splatters instead of the suggested whipped cream. It is seriously delicious!

To make your own 9x13 pan of gingerbread, you will need:

For the cake
1 c. whole wheat flour
1 1/2 c. all purpose flour
2 tbsp. tapioca flour
1 1/2 tsp. baking soda
1 tbsp ground ginger
2 tsp cinnamon
1 tsp ground cloves
1/2 tsp. salt
1/2 c. canola oil
1 c. molasses
1 tbsp. vinegar
1 c. coffee (the darker, the better)
1/3 c. crystallized ginger, chopped
1/3 c. pecans or walnuts, chopped

For the icing
Note: this icing recipe makes enough to cover the top of the gingerbread. If you want to flip it out of the pan and ice the sides as well, you will need to double it.
1/4 c. margarine or shortening
1 c. powdered sugar
Juice of 1 lemon
2 tbsp. soy milk (or other nondairy milk)

For the topping
1/4 c. crystallized ginger, chopped
1/4 c. pecans or walnuts, chopped
a few tablespoons molasses (you can use as much or as little as you like, but remember that straight molasses has quite a strong taste, so try not to go overboard on the topping)

1. Start oven preheating to 350F and grease a 9x13 baking dish.

2. In a large mixing bowl, combine flours, baking soda, ginger, cinnamon, cloves, and salt.

3. In a separate bowl, combine sugar, oil, molasses, and vinegar.

4. Mix wet and dry ingredients. The batter will be quite stiff at this point--don't worry! The next step will fix that right up.

5. Add coffee to batter.

6. Fold in chopped ginger and nuts.

7. Pour batter into pan and bake for 30 minutes, or until a knife inserted in the center of the cake comes out fairly clean.

8. Allow gingerbread to cool for at least 20 minutes before icing.

9. To prepare the icing, mix together margarine, icing sugar, lemon juice, and soy milk. Spread evenly on top of the gingerbread. Sprinkle nuts and ginger on top of icing. Finally, make the molasses streaking by taking small spoonfuls or knifefuls of molasses and flicking them across the gingerbread (warning, it can get a little messy!). The molasses will flick better if they are warmed briefly in the microwave (no more than 10 seconds) beforehand.

Slice and enjoy with a glass of soymilk or a scoop of vegan ice cream!

Tuesday, September 1, 2009

Cupboard scrounging: black bean empanadas

Despite my love of cooking and general obsession with food, I sometimes get busy with other stuff and when dinner time rolls around I find I've forgotten to go grocery shopping since what seems like the Carter administration. Since I'm a) lazy, and b) cheap, the end result is usually a dinner thrown together from various non-perishables floating around my kitchen cupboards. Last night was one of those evenings and the end result was these:


Black bean empanadas! These were quick to prepare, filling, and even tasted pretty good! I also had leftovers so lunch today was all taken care off as well. This recipe makes enough dough and filling for eight empanadas. I made it up mostly out of my head so no guarantees on authenticity.

Empanada dough
2c. flour
2 tbsp canola oil
1 tsp baking powder
1/4 tsp salt
1 tbsp. vinegar
2/3 c. cold water


Black bean filling
2 c. cooked black beans
1 c. diced tomatoes (I used three roma tomatoes)
1 small onion, diced
3-4 cloves garlic, crushed
1 jalapeno pepper, seeds removed, finely chopped
1 tsp cumin
1 tsp coriander
1 tbsp oil
salt to taste

1. Prepare the dough. In a mixing bowl, sift together flour, baking powder, and salt. Add the oil to the flour and mix--the flour will become somewhat crumblike. Add vinegar and 1/3 c. water and knead together. Slowly add the remaining water until the mixture becomes a soft (but not sticky!) dough. Roll dough into a ball and leave to sit while you prepare the filling

2. Filling: In a frying pan on a medium heat stove, heat the oil. Add garlic, onion, and jalapeno, and cook for 5 minutes, stirring occasionally. Add cumin, coriander, and tomato and cook for another 10 minutes. Add the black beans and cook for another 5-10 minutes, until everything is nicely heated. Turn off the stove and get going on rolling dough.


3. Divide the dough into eight pieces. On a lightly floured board, roll each piece into a roughly 6" circle.

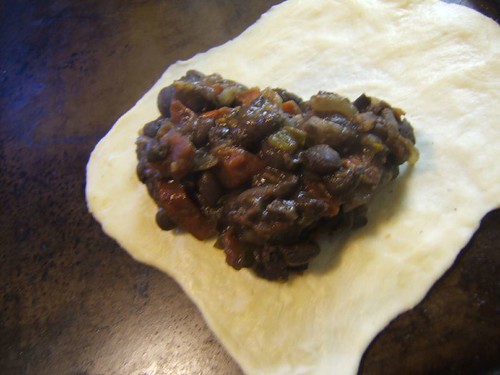
4. Place approximately 1/2 c. black bean filling on each dough circle, like so:


5. Fold half the dough over the fillings and crimp around the edges with a fork. Repeat until all the empanadas are filled. Place on a baking sheet and get ready to stick those guys in the oven:


6. Bake at 350F for ~25 minutes, until empanadas are lightly browned. Remove from oven, allow to cool for a few moments (unless you are into burning the roof of your mouth off, in which case, okay, cool, whatever floats your boat), then enjoy!

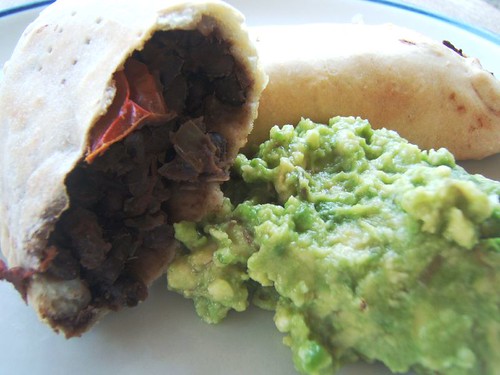
These empanadas were great with a little guacamole, and I bet salsa would pair nicely too:

Monday, August 31, 2009

Recipe: Hummus duo and baba ghanoush with pita crisps

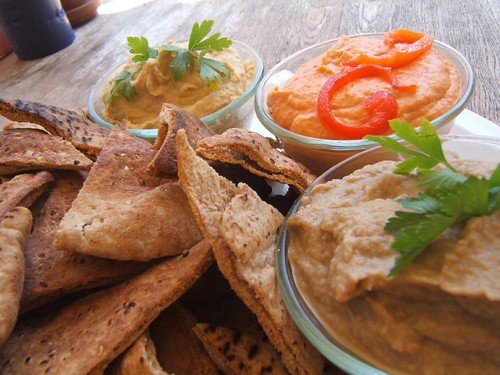
I went to a potluck this weekend, and needed to bring something that could be served cold, since I had a load of errands to run beforehand. Of course, I also wanted it to be somewhat impressive. I decided to go with a selection of dips and pita crisps for dipping:


Yum, no? I made baba ghanoush, roasted red pepper hummus, and a classic plain hummus. It sounds like a lot of work to make three dips, but a lot of the prep work for these is combined, so if you're going to commit to one, the trio can be done for not a lot of additional effort. For example, you can roast the eggplant, red pepper, and garlic at the same time, and also have the pita toasts going on your second oven rack. And then you have a great selection of dips to take to parties, break out as snacks, spoon on top of salads, etc. The possibilities are endless!

To make your own, you will need:

1 head garlic
1 large eggplant (1.5-2lbs)
2 red peppers, halved, with seeds removed
2 c. chickpeas
1/4 c. +2 tbsp lemon juice (1/4 c. for hummus, 2 tbsp for baba ghanoush)
1/4 c. tahini (2 tbsp for hummus, 2 tbsp for baba ghanoush)
1 tbsp cumin (2 tsp for the hummuses, 1 tsp for baba ghanoush)
1/4 c. cayenne (optional)
2 tbsp olive oil (1 for hummus, 1 for baba ghanoush), plus ~2tbsp for roasting vegetables
salt to taste
a few sprigs parsley for garnish

NOTE: Both hummus and baba ghanoush can be adjusted a lot to suit your tastes. These are the general proportions that create a hummus that I like, but you may find you prefer something a little different. Treat the recipes more as suggestions than anything set in stone, and feel free to adjust quantities or make additions as you see fit.

If you want to make pita chips, you will also need some pita bread. I used 1 package of 8 pitas for the potluck, but you definitely get enough dip to use up a couple of packages. Slice pitas into eights to make chips


1. Slice eggplant in half and salt. Leave eggplant to sweat for 30 minutes.

2. Brush eggplant and red peppers with olive oil and arrange on a baking sheet. Place garlic on baking sheet as well. Bake in a 450F oven until eggplant is soft and peppers are slightly blackened, ~20 min. If you are making pita chips, you can also arrange them on a baking sheet and toast while you have the oven going.

3. While the vegetables are roasting, you can get started on the plain hummus: in a food processor, combine the chickpeas, 1 tbsp olive oil, 2 tbsp tahini, 2 tsp cumin, and 1/4 c. lemon juice. Blend until smooth, thinning with water as needed (you can also thin with lemon juice or olive oil--be sure to taste test frequently to see how things are shaping up!)

4. Remove vegetables from oven. Leave the eggplant and peppers for a moment. Pull all the cloves off of the garlic and squeeze the garlic out of its skins. Add half of the garlic to the hummus and blend thoroughly. Remove a little more than half of the hummus from the food processor, and your classic garlic hummus is done! The hummus left in the food processor will form the basis of the red pepper hummus.

5. Peel the skins off of the red peppers. Slice a thin piece or two off of the peppers to use as garnish. Coarsely chop the remaining pepper and toss in the food processor with hummus. Blend until smooth. Scrape the hummus out and clean off the food processor for the final dip, baba ghanoush.

6. Baba ghanoush time! Remember that eggplant you roasted? Scrape out the flesh and place it in the food processor (chuck the skins into your compost). Add the rest of the garlic, 2 tbsp lemon juice, 2 tbsp tahini, 1 tsp cumin, 1/4 tsp cayenne and 1 tbsp olive oil. Blend until smooth. Scrape out the baba ghanoush.

7. Arrange your dips in nice bowls and garnish with parsely and red pepper slivers. Serve with pita chips:


Enjoy!

Friday, August 28, 2009

Millions of peaches...

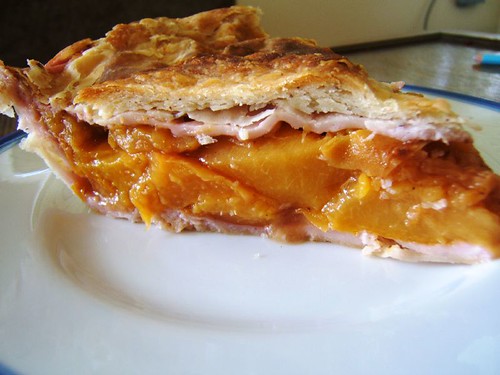
Okay, maybe not quite millions, but today's dish+recipe packs a serious peach punch. Peaches were a mere 50 cents a pound at the grocery store this week, a bargain even here in the land of abundant affordable produce. This pricing scheme has two key implications. First, I have been eating a half dozen peaches or so every day. Second, it's time to make a peach pie:


I like to keep my peach pie fairly simple, with minimal additions. I did make the crust for this one from scratch, but I hear it's possible to get perfectly acceptable (and even vegan) puff pastry in the freezer case of your grocery store these days. Personally, I am determined to eventually make a good vegan rough puff (this one was merely okay, so I'm not posting the recipe) so I am resisting the siren call of Pillsbury for now.

Once you have figured out the pastry end of things to your satisfaction, it's time to make the filling. One thing I personally hate about fruit pies is that you sometimes wind up with a huge gap inside the pie between crust and filling. This gap is due to the pastry baking enough for its shape to set before the fruit has really started to cook down and shrink in volume. The solution to this problem is to pre-cook the fruit for 15-20 minutes on the stovetop.

For a super peachy filling, you will need:

~4lbs ripe peaches, washed, pitted, and sliced (NOTE: Try to get peaches that are not underripe, as they aren't as sweet).
juice of 1 lime
1 1/2 tsp. cinnamon
1/2 tsp. nutmeg
1 tbsp. sugar
1 tbsp. cornstarch or arrowroot powder

1. In a large saucepan, mix together peaches and lime juice and let sit for a few minutes.

2. Add nutmeg, cinnamon, and cornstarch to peaches and stir together until well mixed

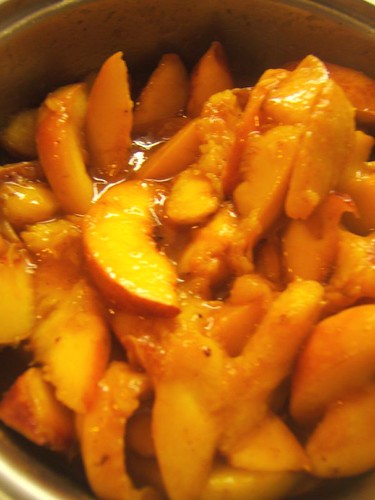
3. Place saucepan on stove over medium heat. Cover saucepan and cook peaches for 15-20 minutes, stirring every few minutes. If the peach juice begins to boil, reduce heat. Eventually your peaches should look something like these guys:


4. Turn heat off on stove and add the sugar to peach mixture. Roll out the bottom half of your pie crust and place in pie dish. Spoon the peach filling into crust. Roll out top crust and place over top of filling. If you have leftover pastry dough, use some to decorate your pie. I usually go with four leaves (as pictured above), but there's no reason why you couldn't do something different.

5. Place pie in a 450F oven and bake for 30-40 minutes, until pie is nicely browned.

6. Slice and serve:

Wednesday, August 26, 2009

Recipe: Black bean soup with kale and tomatoes

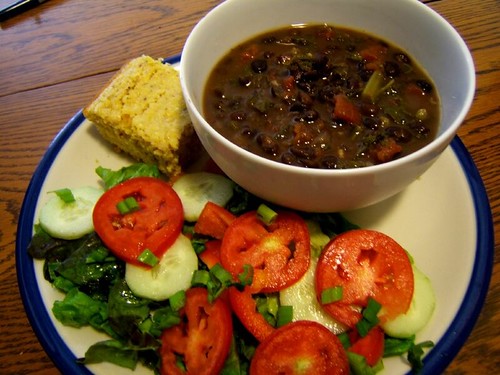
Although it is technically the peak of summer here, we've been getting a lot of cool, cloudy weather, courtesy of the local marine layer. Which means that fall foods like hot soup are totally appropriate for the menu rotation, especially paired with a simple salad and some delicious cornbread like the stuff featured yesterday:


Black bean soup is one of my favorites, but I find it can be kind of heavy if it's just beans. This version mixes things up by adding in tomatoes and kale. It's delicious, filling, and with the fiber, iron, calcium, and protein, also made of nutritional win.

Black bean soup with kale and tomatoes


Ingredients

5 cups cooked black beans
28 oz can diced tomatoes
1 15oz can vegetable broth OR 1 carrot and 1 stick of celery, diced, plus a pinch each of oregano and thyme
3-5 c. water (depending on whether or not you are using stock)
1 bunch kale (approx. 1/2 lb), finely chopped
1 medium onion, diced
4-5 cloves crushed garlic (you can dial down the garlic if you like, I tend to load it onto everything)
1 tbsp olive oil
1 1/2 tsp. cumin
1 1/2 tsp. coriander
1/2 tsp. cayenne pepper (adjust as desired depending on your heat preference)
salt and pepper to taste.

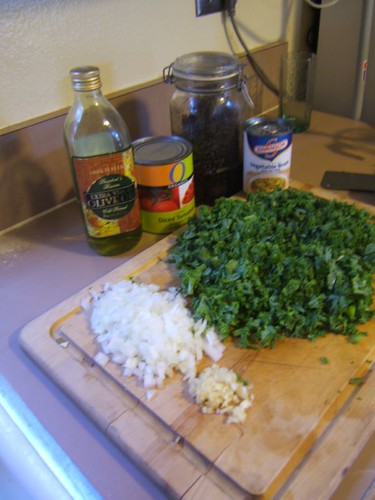
1. Assemble all your prepared ingredients:


2. In a large saucepan or soup pot on medium heat, heat the olive oil. When a piece of garlic dropped in sizzles, you're good to go.

3. Add the garlic to the oil and saute for 1 minute. Add the onions and continue to saute, stirring occasionally, for 2-3 minutes. If you are not using stock, add the diced carrot and celery. Continue to saute until onions are nicely softened up and slightly clear (not carmelizing, although some carmelization will not ruin things, so don't sweat it too much). Add the cumin and coriander.

4. Add kale into the mix and cover pot for 1 minute, kale should be lightly steamed. Remove lid and stir for a few more minutes, until kale is fairly wilted.

5. Add cayenne, vegetable stock (if using, alternatively add 2 c. additional water), tomatoes, 2 c. water, and black beans. Stir together and cover pot. Bring mixture to a boil, then turn heat down and leave soup to simmer for 30 minutes. Check occasionally and add additional water if needed. Salt and pepper to taste. I find it's best to go light on the salt and pepper in the soup pot and then let people go with their own preference after it's been served into bowls. Which leads nicely to step 6....

6. Turn off burner and ladle soup into bowls. Serve with salad and cornbread.

If you don't have cornbread handy, a few tortilla chips crumbled on top are also a nice touch. Or just skip the refined carbs completely if you must, the soup will be delicious on its own.

Monday, August 24, 2009

Mediterraneand salad

Yup, another salad. What can I say? It's summer and they're delicious!

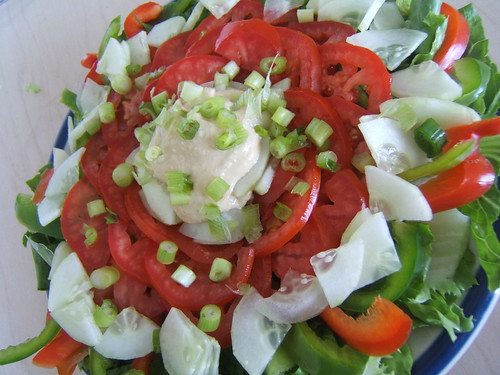
This salad mix is my basic lunch fallback when I don't want to have to think too much about ingredients or flavor combinations. Right now I'm probably eating it a couple of times a week:


I like to think of the flavor theme as vaguely Mediterranean, but really it's just good.

You'll need (for a 1-person meal sized salad):

6 leaves red leaf lettuce, washed and chopped
1 roma tomato, sliced
1/2 green bell pepper, sliced
1/2 red bell pepper, sliced
1/2 cucumber, peeled. Slice the cucumber into thin pieces and quarter them to get the look here.
2 tbsp hummus
handful chopped scallions

To assemble: You can toss everything together or go for a fancier assembly (pictured above). I place the lettuce on a plate and spread it evenly across the surface (not mounded in the center). Then arrange the vegetables. Here, the peppers form the base of the vegetable topping, arranged to lie like bicycle wheel spokes. The tomato goes next, forming a ring around the middle of the plate. Finally, place the cucumbers in a mound inside the tomatoes, and leave a small depression for the hummus. I had quite a bit of cucumber so I also put some around the outside of the tomatoes. Finally, spoon the hummus onto the cucumbers and top with scallions.


Say grace, dig in, and enjoy!

Saturday, August 22, 2009

Sweet Tooth Saturday

I don't know about you, but I really love making (and eating) desserts. Sure, the stuff that comes before is great too, but a really good dessert? Hands down one of the best things ever.

I got into making cupcakes a while back when the amazing Vegan Cupcakes Take Over The World came out. Since then I've started playing around with my own flavor combinations and making up recipes. Some are better than others (ask me about the licorice cupcakes I made last Halloween sometime...), but these latest ones are definite winners:


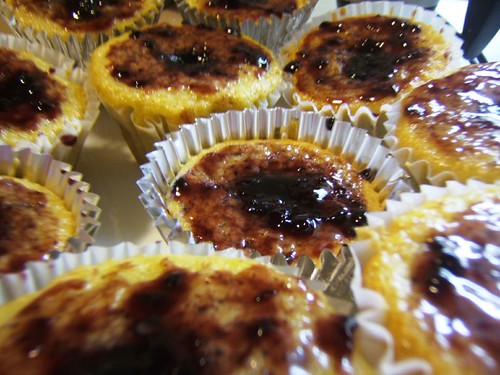
Lemon cupcakes with blackberry filling and a lemon buttercream frosting. Yum! Like a lot of my cooking and baking, this recipe was inspired by odds and ends in the kitchen that needed using up quickly. I had a few lemons that were heading towards overripe, and also some leftover blackberry flummery (basically a blackberry sauce concoction...I thickened it up on the stove a bit for use here, I've written the recipe to just use blackberry jam since I eventually wound up with that general consistency).

This recipe makes about a dozen cupcakes, although I think I could have stretched it to 13 or 14 if I had been using regular rather than "jumbo" liners. You will need:

Dry ingredients
1 1/4 c. flour
2 tbsp arrowroot powder
1 tsp baking powder
1/2 tsp baking soda
pinch of salt

Wet ingredients
1 c. milk
3/4 c. sugar
1/4 c. lemon juice
1/3 c. canola oil
1 tbsp vanilla extract
zest of 1 lemon

Filling
3/4 c. blackberry jam or preserves. Blueberry would probably also work well.

Frosting
1/2 c. margarine or shortening
juice of 1 lemon
1/4 c. soymilk
2 c. confectioners sugar

1. Preheat oven to 350F and prepare a muffin tin with 12 cupcake liners.

2. In a mixing bowl, combine all of the wet ingredients (including sugar).

3. In a separate bowl, sift together dry ingredients.

4. Add dry ingredients into wet and stir together. It's important not to stir the batter for too long--no more than a few minutes. Don't worry if there are still a few lumps in the batter

5. Spoon batter into cupcake liners. I like to use a 1/4 c. measure and a silicone spatula to get the batter into the liners.

6. Bake at 350F for 20-25 minutes, until cupcakes are slightly browned. Remove from oven and transfer to a cooling rack. Allow cupcakes to cool completely before filling or frosting.

7. When cupcakes are cooled, poke a hole in the top of each one with a knife or your (clean) index finger. Load all but a few spoonfuls of the blackberry jam into an icing bag with a fairly wide tip attached. For each cupcake, place the tip into the hole you've poked and squeeze gently. After the cupcakes are filled, spread the remaining jam in a thin layer across the top of the cupcakes:


8. Prepare the frosting. With a hand mixer, cream the margarine, lemon juice, and soy milk and frosting together. Slowly sift in confectioner's sugar.

9. Frost the cupcakes! You can either spread with a knife or use an icing bag and tip to get fancy. Since these cupcakes are already spread with a jam layer, the icing bag route will give a tidier finish, but either will result in delicious cupcakes.

Wednesday, August 19, 2009

summer salsa salad

While I really enjoy breaking out all the pots and pans and cooking a big fancy meal, I'm also a huge fan of simple foods. Salads are one of my go-to lunches: easy, filling (provided you have the right components), fresh, and colorful. Here in California there is beautiful produce available almost year round, but the summers are especially wonderful. I pick up a assortment of vegetables at the farmer's market and grocery store, then turn them into lunch throughout the week,

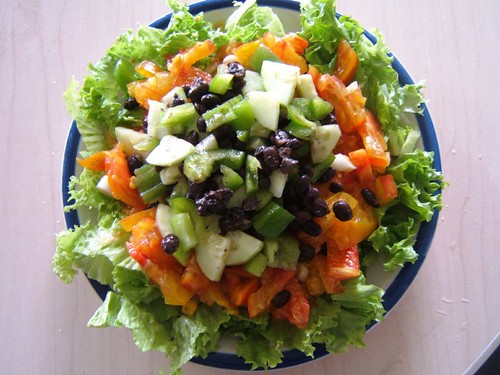
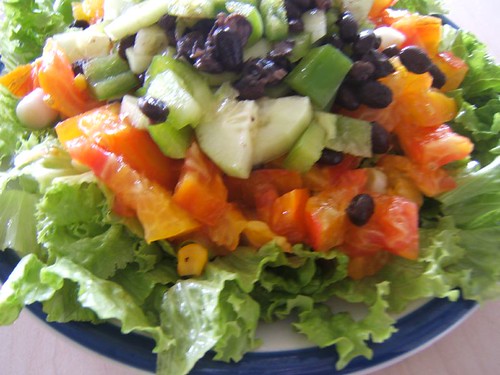
I mixed up this delicious summer salsa themed salad the other day and it did not disappoint:


In it, we have:

~2 c. romaine lettuce
1 heirloom tomato, diced
1/2 green bell pepper, diced
1/2 cucumber, peeled and sliced
2 tbsp Trader Joe's corn salsa
1/2 c. cooked black beans
handful chopped scallions
a few sprigs of cilantro

While we're on the topic of salad, I'm also going to mention one of my weird food things: I don't do salad dressing. Not for any particular health reason, but because I never liked it as a kid. And then I found out that most dressing wasn't that good for you anyway, so I never bothered to seriously acquire the habit. I do make occasional exceptions for a nice oil and balsamic vinegar, but in general I prefer my salad naked.

A lot of people are really surprised to hear about my no-dressing preferences, insisting that salad by itself tastes bland or even gross. My answer to that is that these people are clearly eating the wrong kind of salad. If you chop up a head of iceberg lettuce and call it a day, then yes, it is bland, and yes, dressing will probably improve it. The key to a good salad that is not dependent on slatherings of ranch is to have lots of interesting ingredients. I have a couple of salad guidelines that I like to try and follow:

1. NO ICEBERG LETTUCE. Sorry, this one is super important, so I had to go with the all caps. My top pick for greens would be spinach, as it has the best vitamin and mineral content. In case you weren't aware, spinach is a great source of iron for vegetarians and vegans. Unfortunately, it is not as great a source of calcium as some folks would have you believe, despite what the nutrition label may say. If you can't spring for spinach, at least get some more interesting varieties of lettuce: romaine, bibb, red, etc.

2. Have lots of non-greens components. I like to try to have at least three non-greens vegetables in my salads. Some good options include: tomatoes, peppers, cucumbers, sprouts, carrots (especially attractive if you take the time to grate them), artichoke hearts, beets. Also, if you have any cooked vegetables leftover from dinner the night before, chop them up and toss on your salad as well.

3. Make your salad a meal. Vegetables are good for you, but they don't make a very filling meal by themselves. I like to make my salads a full meal by adding some sort of bean and/or grain into the mix. Cook a large batch of beans in your crockpot on the weekend and then toss a handful onto your salads throughout the week. My favorites are black beans and chickpeas, but red and white beans can also taste good. For grains, I like to add a little couscous, whole wheat pasta, or quinoa (which I know is not technically a grain but in my kitchen it gets treated like one).

4. Dress up your salad with non-dressing. While I hate traditional dressing, I do like to add things like a generous dollop of hummus or a few chopped nuts to my salad. They add a lot of flavor and much more nutrition than anything you'll find in a bottle at the grocery store.

It's really very simple to make a delicious, healthy, and interesting salad. Now put down that dressing bottle and head of iceberg and get to work on yours!